Showing posts with label Food. Show all posts

Wednesday, March 18, 2015

A Busy Day!

The six puppies that will go to their new homes this weekend were taken in for their vet checks this morning.  Here they are in the back of the car looking as cute as ever! :)


It was baking day for me. First I made sour dough bread.  It takes all day to rise, so you have to get started early.  Next I made five loaves of my whole wheat bread.  Here is a stack of sour dough tortillas that I made for lunch.  They are so simple to make, but it's not a quick job.  The dough is just three cups of starter, three cups of flour, and three teaspoons of salt.  That will make about 8 tortillas.  I just roll them out and cook them in my cast iron skillet until they are brown on both sides.  Normally I shy away from foods that are very time consuming to make, but these are so good - and I had a craving for one. :)


Todays lunch - chicken and veggies wrapped in a sour dough tortilla, blue corn chips, and lacto-fermented salsa.


Whole wheat bread - with one loaf missing!  "Mike...?" :)

This morning at 5am, while some were still in bed, Mike was out in the sugar shack firing up the evaporator. :)  The sap has been flowing good for the past few days.  Today the boys and I collected 96 gallons!  Mike is still boiling and will likely be at it until about 10pm.  A long day.  Not really!  He enjoys it, and we enjoy going out to visit with him.  We ate lunch and dinner out there today. :)

Here you can see that the vents above the evaporator are open to let the steam out.


This is the evaporator pan.  You can see the pipe where the sap flows in and the different compartments that the sap flows through.

Jonny is checking the sugar content.


Got to keep that fire burning!!!  The firebox gets filled every 15 minutes!


That is a HOT fire!  And a nice pile of coals!  Hot dogs anyone? :)


Dinner - lamb stew and garlic toast by a warm fire with the smell of  sweet syrup in the air.  Wish you were here! :)

  The finished product! :)

Well, time to go!  My sour dough bread is finally ready to go in the oven, and I'm itching to go hang out in the shack with my hubby! :) Night! :)


Monday, October 20, 2014

Give Your Dog a Bone!

Dog: a domesticated carnivorous mammal.  Yes, your dog is a carnivore!  And carnivores eat raw meat and bones.  It's hard for our domesticated minds to grasp the fact that dogs never used to eat food from cans and bags, but with the growing health problems in this country -both in humans and animals - it's time to take a look at the diet!

When we tell customers to feed their puppies raw meaty bones, they usually say, "I didn't think you could feed dogs bones.  Won't they choke?"  No, your dog won't choke.  Most dogs eat bones like we eat chips - "crunch...crunch" and down the hatch! :)  It's pretty amazing to watch!  The key with feeding bones is that they must be raw.  Cooked bones can splinter and cause problems, but raw bones are very nutritious and good for your dogs teeth.  Just make sure your bones are not too large.    Chicken wings are a fine food for puppies!

 
In the same way that we must eat what we were designed to eat in order to be healthy, your dog must eat what it was designed to eat to be healthy.  We would not expect a child raised on processed foods to be healthy, so why would we expect that of our animals?  Raw foods are best for everyone! While it may not be possible to feed them raw meat all the time, even supplementing their diet with raw meaty bones will help. 


Thursday, April 11, 2013

More Fun With Sourdough Starter

I make my family sourdough waffles once a week, usually on Wednesday, and I make sourdough pancakes once a week, usually on Friday.  Both recipes are simple, quick and delicious! 

I have also make sourdough herb rolls.  These are yummy!  You make them the same way you make your sourdough bread only you add herbs to your dough and shape them into rolls.  The recipe is below.
Click here to learn how to make sourdough starter


Sourdough waffles in my waffle iron

A large platter heaping with sourdough waffles


Sourdough Waffles
4 cups sourdough starter
4 eggs
1 cup of butter, melted (or 1/2 cup butter, 1/2 cup coconut oil)
2 cups flour
2 tsp. and 2 T. baking powder
1 tsp. salt
1 cup milk

Mix ingredients well and pour into a waffle iron.  Makes about 20 waffles.


Sourdough Pancakes
4 cups sourdough starter
4 eggs
1/4 cup melted coconut oil
1-2 cups of flour
1 tsp. baking powder
1 1/2 tsp. baking soda
1 tsp. salt

Mix ingredients well and pour onto a hot griddle.  I will often make either banana or apple pancakes.  For banana pancakes I just add a mashed banana or two to my batter.  For apple, I grate up the apples and add them to the batter or just add the grated apples to the top of the pancakes.  We also like adding blueberries.   Enjoy! :)


Herb Rolls
To your sourdough bread, add the following: (Click here to learn how to make sourdough bread)
3 T. Parsley
3 T. Dill
2 T. Caraway

Adding herbs to my bread dough


Dough shaped and ready to rise

Ready for the oven


Finished herb rolls

Yummy herb roll, fresh out of the oven! :)
Experiment with your starter and have fun!  Let me know what you come up with. :)

Wednesday, April 3, 2013

Sourdough Starter Tips

About every 3-4 weeks, you will want to change the jar that you keep your starter in because the starter on the sides of the jar will begin to go bad.  If you notice a putrid smell coming from your jar, do not throw away your starter.  Chances are that you just need to change your jar.  If you pour your starter into a clean jar and it still smells off, throw all but half a cup away, and feed your starter.  It will get active and bubbly and smell fine by morning.


Here's how my jar looks after two weeks.

Remember to feed your starter daily. In the hot summer months, you may need to feed it twice a day to freshen it up because the warm weather makes it sour faster and go bad faster. The more you feed it, the less sour it will be.

Sometimes your starter will look dark and watery if you have missed a feeding or two.  No worries.  Just feed it and keep it going.  You may want to feed it again a few hours later.

Give your starter at least 10-12 hours to sour (after the last feeding) before you make your bread.  Otherwise your bread will not have much flavor.  If you like it really sour, let it sit longer. :)

Never use all your starter.  Always leave at least half a cup in the bottom so that you don't have to go through the process of making your starter again.

As I said in my first post, I do not measure my water and flour when I feed my starter.  I just use a wooden spoon and put a few scoops of rye four in my jar, and then hold the jar under the faucet and add some water.  I mix it up really good, and that's it! :) 

If you are going on vacation and need to refrigerate your starter, feed it first before you refrigerate it.  When you take it out, feed it again.  Then wait until the next day to use it.

I grind rye berries about once a week and fill a container with the flour.  I keep the container of ground rye flour in my freezer to prevent it from going rancid.  I get my rye berries in 25# bags from Country Life Natural foods.

Any questions? :)

Monday, April 1, 2013

Making Sourdough Bread

Click here if you want to learn how to make sourdough starter

I make bread about once a week and leave my jar of starter out all the time. If you are not going to be making bread, you can put your jar in the refrigerator. The cold temperature will cause your starter to "sleep". If you want to take it out and use it, you will need to wake it up again by adding more flour and water. Then by the next day, it will be bubbly again. At that time it will be ready to use.

If you want to make bread, but don't have enough starter, you can feed your starter every few hours to build it up. But wait until the next morning to make your bread or it will not taste very sour.

Decide what morning you are going to make your bread.  Consider that the bread will take about 8 hours to rise. I make it after breakfast and then bake it after dinner. 

So it's morning, and you are now ready to make your bread.  Do not feed your starter until after you make your bread.  You want your starter to be bubbly, active, and sour.  My simple bread recipe has the following three ingredients:
1. starter
2. salt
3. flour

My recipe makes three regular sized bread loaves (or you can shape them to go into different pans).  To do this I add 6 cups of starter to my bowl, 2 tablespoons of salt, and as much flour as I need to get a good consistency.  I like to mix my bread in my Bosch mixer.  You could use a KitchenAid or do it by hand.  The rule of thumb with the Bosch is, you know you've added enough flour when the dough no longer sticks to the sides of the bowl.  With sourdough, I usually end up adding a little more flour than that.  So just keep adding and mixing until you have a nice dough ball.  It will be around 6 cups of flour.  Once you have enough flour, kneed it a few times, shape it, and put it into your pans.  It's that simple! :) 

Six cups of starter


Two tablespoons of salt

Flour

Mixing it up

I do not use bleached flour.  I use a flour called Golden White.  It has the bran taken out, but the germ left in, therefore it is more nutritious.  You can also use other flours.  I like to add two or three cups of rye flour and the rest white.  I have used wheat occasionally too, just for something different (although I have found that the bread takes longer to rise with wheat).

It is OK if the bread is a little sticky.  When you are ready to shape it, put some olive oil on your counter and coat your dough with it.  Cut it into however many loaves you need, and then roll it and shape it to fit into your pans.  Cover your pans with a towel and let the loaves sit until they are the size you like, about double.  Your dough will rise very slowly, so be patient.  I've had my dough rise in 6 hours and have had it take as long as 10 hours, but it's usually ready in about 8 hours.  Bake your loaves at 350 for one hour.  That's it!  You will love this bread!  Now don't forget to feed your starter again.  Always feed it after you use it.

Sourdough is not as picky as yeast bread.  Every loaf turns out, but not every loaf is the same.  Some will be more dense, others light and fluffy.  Some will taste more sour than others.  You are catching bacteria from the air, so it will not always be predictable, but my family will tell you, it always tastes good! :)

Bread loaves rising in pie plates

The finished product

Bread that was bake in a stoneware bowl

Shaped to fit  a long dish


This bread dough is in a basket lined with a towel that's coated with flour.  This works really well.  You can find narrow baskets at Walmart and use those for make sourdough "french" bread. 

Here are the two loaves ready to go into the oven.  I flipped the loaves onto my hand and forearm and them put them on a rectangular stone that was already preheated in the oven.  One loaf was served to company on Friday with spaghetti hot dish.  The other loaf was served for Easter brunch along with quiche, fruit salad, sausage, and banana bread.

Email me or post any questions that you have.  I will try to find time this month to do a video for you, so you can see the whole process.

Next I will post on some other things you can do with your starter! :)  It will become your best friend! :)

Monday, March 25, 2013

Sourdough starter

Thanks to those of you who have been waiting patiently for me to do this post! :)  Here we go....finally! :)

Why sourdough?
Like many foods, we have changed them in order to make them more shelf stable, quicker to produce, and more eye-catching.  Of course profit is behind it all.  It's no different with bread.  Natural leaven was replaced with baking yeast because the bread had a more consistent rise, was larger and fluffier, and a person could make it faster.  And as with most foods, nutrition was compromised in the process.  The bread became less digestible and less tasty.

I have been making sourdough for many years.  I started out making it by hand.  The process was a little tedious, but having good bread that my family loved made it worth the work.  Then I heard about a sourdough bread class.  I thought it would be good to refine my skills. The instructor made the most beautiful sourdough bread that I have ever seen, and it tasted great.  The only problem was it took three days to make her bread!  The first day was spent feeding the starter.  The second day required a total of 8 different steps spread out over 6 hours.  The third day required about 6 or 7 steps and about 4 more hours.  I left that class thinking, "Well, I will probably NEVER do that!"

Since that time I determined that I would learn to simplify the process.  Making sourdough was not that complicated for the pioneers. (Laura Ingalls Wilder talks about the process in  her book By the Shores of Silver Lake.)   So last September I started experimenting.  I will share with you the process that I came up with.

I know you are anxious to make some bread, but first you need to make your starter.  This is simple.  For seven days, combine rye flour and water in a gallon jar or large non-metal bowl.  After seven day, you will have your starter.  It will be a bubbly mixture with a sour smell.

I do not measure my flour and water, but if it's easier for you, you can add one cup of rye flour and one cup of water every morning.  Stir your starter well, making sure you get all the flour mixed in.  You want your starter to be kinda soupy.  Leave your jar on the counter and cover it with a cloth secured by a rubber band (keeps any bugs out...particularly helpful during summer months).  This jar in now your pet. :)  You must feed and water it every day. 

So that is how you make your starter.  In my next post, I will tell you how to make your bread.

Making Starter
1.  Mix 1 cup of rye flour and 1 cup of water in a gallon jar every day for seven days. 
2.  Leave jar on the counter. 
3.  Cover with a cloth.

My sourdough starter


How to make sourdough bread

Sourdough starter tips
 

Tuesday, March 19, 2013

Health Journal - Making Vegetables the Main Course (Part 2)

I should have named this post "Making Produce the Main Course".  The more you can focus on produce when menu planning, the healthier your family will be.  It is a very easy way to simplify a busy life.  There is no need to make fancy recipes.  Just keep it simple- fruit for breakfast, salad for lunch, and lots of cooked vegetables with dinner.  Eat as much as you want, you will be totally satisfied, and you will look and feel great.  I will give you some ideas for meals that have worked well for our family.

If you are dealing with disease, extra weight, allergies, or chronic fatigue - anything, your answer is found in your food.  As Hippocrates said,
"Let food be your medicine and medicine be your food."
God did not give us all those nutrient-rich foods for no reason.  They are packed with all that our bodies need for good health!  As I said before, God is the Master Chemist!  He created all kinds of foods for our bodies, but we think we are smarter than God.  We take those healthy foods, pull certain constituents out of them, put them in a pill or capsule, and think we will find health.  I have tried taking vitamin and mineral supplements and they don't work!!!  They make you sicker.  You do not need vitamins, you just need God's food.  The following is a quote from the book Eat to Live by Joel Fuhrman, M.D.:
"There are subtle nuances and nutritive interactions that create disease resistance from the synergy of diverse substances in natural foods.  Like a symphony orchestra whose members play in perfect harmony, our body depends on the harmonious interactions of nutrients, both known and unknown.  By supplying a rich assortment of natural foods, we best maximize the function of the human masterpiece."
 
I believe that grains, nuts, seeds, eggs, fats, raw milk, and meat are also important for good health, but fruits and vegetables are the best source of disease-fighting ,nutrient-dense food, so make them the main course! :)

Here are some ideas for breakfast.


A grated apple with baked oatmeal (Let me know if you want this recipe. It's the best oatmeal!) and ground flaxseed - this is one of my favorite breakfasts!
Simply grate an apple, put a scoop of baked oatmeal on top, and sprinkle with ground flaxseed.  Flaxseed is a great source of Omega-3 fatty acids, so add some to your breakfast or put some in a smoothie.  There is no need to take an Omega-3 supplement, just eat flaxseeds or walnuts daily.

 
Here we have scrambled eggs with onions, mushrooms, and garlic on a bed of spinach greens and fresh broccoli.  Great breakfast!

This quick and simple breakfast is not only healthy but surprisingly filling.  It's just fruit (apple, orange, and kiwi) covered with ground flaxseed.  We are always trying new fruit combinations to spice things up a bit. :)
 
 
We usually have a kefir shake every day for a snack, otherwise we will just have fresh fruit.  Here are two more that we like.
 
These banana sandwiches are made with a combination of peanut butter, coconut, and maple syrup.  They are yummy!

Here we have the same peanut butter mixture as above only I added more maple syrup to make it easier for dipping.  Ground flaxseed could easily be added to this too.

Snackin' during science class. :)
 
 
Some lunch ideas... 
 
We bake the sprouted grain tortillas in the oven just long enough to make them crisp and dipped them in our white bean hummus. Chips, dip, and a fresh salad - a great lunch!
 
 
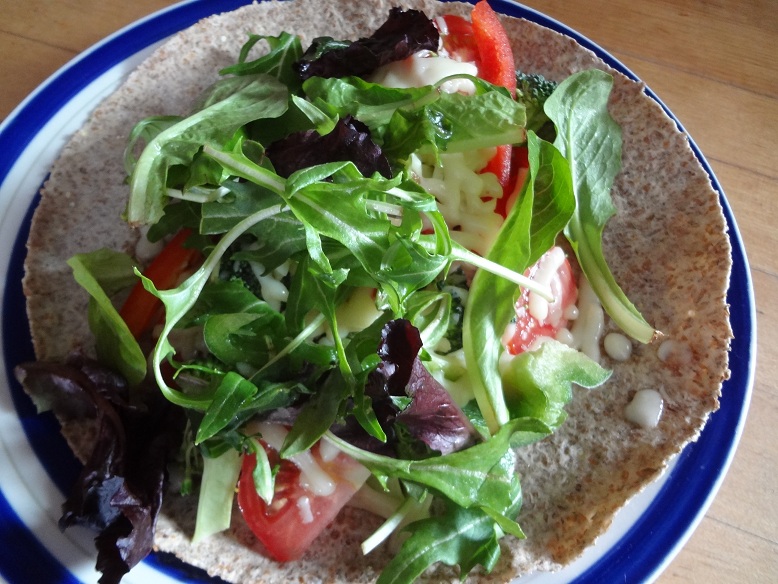
Here we have a vegetable wrap. It's just grated carrots, chopped cabbage, red & green peppers, and homemade ranch dressing. (As a side note, my boys are not fond of some vegetables, like fresh peppers. That is fine with me. Their wraps had everything but the peppers. They eat peppers all the time when I put them in things, like soup, and don't complain.)
 
 
Another wrap idea. This one is made with egg salad. First I put chopped romaine lettuce in the wrap, then slices of cheese, a scoop of egg salad, grated carrots, and chopped cabbage.
 
 A couple dinner ideas...

 
This is vegetable chili.  Simply make your usual chili recipe only add a ton of veggies and extra seasoning.  I think I added 2-3x the amount of chili powder and salt to this recipe.  I just added all kinds of frozen garden produce - zucchini, tomatoes, beans, carrots, peppers, broccoli, onions, and asparagus
 .
Vegetable chili with crushed chips, shredded cheese, and plain yogurt.  We all love this meal!
 
 
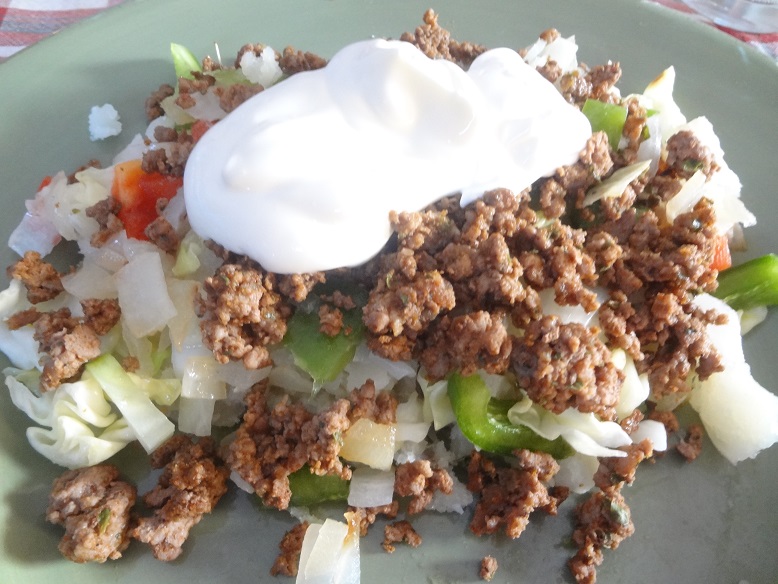
Underneath this pile of goodies is a baked potato.  One of my favorite dinners is a baked potato bar.  We put all kinds of topping on the table and just create our own specialty. 
The following foods make great toppings:
 
taco meat
sour cream or plain yogurt
onions
sauerkraut
peppers
dill relish
tomatoes
shredded cheese
mushrooms
 
 
There is so much variety in fruits and vegetables that meals never get boring.  Try creating your own nutrient-dense meals.  You'll be glad you did! :)

Wednesday, February 27, 2013

Health Journal - Making Vegetables the Main Course

In an effort to feed my family more raw foods, I am working on making vegetables the main course for two of our meals.  Having salads for lunch is nothing new around here, but eating mostly vegetables for dinner is.  I've had to get really creative!  There have only been a few complaints and every once in a while I'll make a fancy dinner where vegetables are not the main course, just to treat my very agreeable family. :)

Lots of people claim to eat healthy.  Healthy is relative.  A vegetarian would tell you that they eat healthy foods, but I would disagree.  I think God gave us meat to enjoy.  Really, He gave us all foods to enjoy.  But what is food?  I think that food is something that is alive; something that will spoil.  Brightly colored, packaged, chemical-filled items are not food.  I am famous for telling my kids, "That is not food!", when someone is tempting them with candy.  I want to get it into their minds so they will recognize it when they are older.  So how do you know if you are eating healthy?  One good sign is to look at how much compost you and your family generate in a day.  By the end of the day, the compost bucket should be full of orange peels, apple cores, banana peels, kiwi skins, onion skins, carrot tops, beet tops, lettuce ends, celery tops, avocado skins, zucchini tops, and such.  If the compost bucket is empty, and the garbage can is full of colorful boxes, cans, plastic bags, and pretty wrappers, well, you are probably not eating what you should be eating.  (Although frozen fruits and vegetables do come in plastic bags and don't generate compost, but they do count as healthy foods.)  God's foods are naturally beautiful.  They don't have to come in fancy eye-catching packaging.  Their colors are not manufactured in a lab, and they contain exactly what we need to maintain health.

One of the best ways to include more healthy foods in your diet, is to think of fruits and vegetables as the main course and the rest of your meal as a side dish.  Once you start eating all those fiber rich foods, you will fill up fast.  And the best part about eating healthy foods is that you can eat as much as you want (or as much as you can) and you will not gain weight.   There are so many benefits to making produce the main course.  You will be slim, healthy, and happy - meaning you will weigh what you should, feel good, and have balanced hormones. 

Here are some samples of our lunches.


Vegetable Pizza
Sourdough crust with pizza sauce and melted cheese. 
On top we put raw veggies - broccoli, tomatoes, onions, and mixed greens. 
Everyone enjoys this meal.


Vegetable Wrap
This is similar to the pizza with veggies, cheese, and mixed greens. 
For the sauce I use our Dill Dip recipe
which includes plain yogurt, dill, fresh garlic, lemon juice, and salt.
Another hit! :)


Fruity Salad
This salad is a treat.  It's made with spinach greens, oranges, shredded carrots, shredded apples, and raisins.  We top this one with homemade French dressing.  Yum. :)


 Taco Salad
We all enjoy this salad too.  It's made with romaine lettuce, cabbage, onions, tomatoes, celery, black beans, and shredded cheese.  Then we put crushed tortilla chips on top and plain yogurt.